Quick Temporary Mobile Install: Chevy Impala
 Anyone looking to do a mobile install should definitely check out the K∅BG Guide. In it, Alan K0BG details most aspects of a mobile ham installation job including electrical and mechanical safety, decoupling, RFI reduction and more.
However – being short on time and money and having my fingers crossed for a near-term vehicle change – we didn’t want to get too involved with a mobile installation. Of course, when doing any kind of installation, all appropriate safety measures should be taken.
The car has an auxiliary jack and cigarette lighter in the unused ashtray shelf, both of which only ever get used for charging cell phones or running an FM transmitter. However, the car fire picture on K0BG’s site made it pretty clear that this might not be a great idea.
 My initial intention was to wire straight to the battery, as is customary, with the wires going through the firewall/passenger footwell via the boot through which the rest of the wiring goes. This sounded like a great idea until I peeled back the carpet, located the boot and discovered that the fasteners needed to be removed from the exterior… and that those fasteners were not only rusted on from years of road gunk and brine exposure, but were also tucked too tightly behind the steering rack to get a wrench on to. This is probably a situation where a wire insertion tool would have been great to get the wires through the firewall.
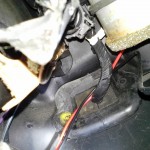
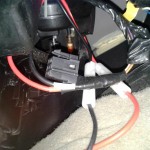
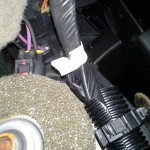
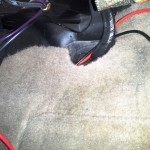
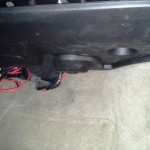
 Many vehicles, especially those with production models used for public safety – like Ford Crown Vics, Chevrolet Impalas and Tahoes, Dodge Chargers, etc. – are designed from the outset with installing aftermarket electronics like radios, computer equipment and more. Undoing two clips and pulling the kick panel fastener (these are handy, if you like them, but I’ve never had a problem just pulling them out by with fingers and/or needle-nose pliers), gives us access to a convenient 20A fused power drop plug meant just for this purpose. The four-pin plug has a ground lead, a serial data lead, an always-hot 12V lead and a 12V lead that is switched with the key. To prevent a bonehead move like leaving the radio on and killing the battery, I chose the switched lead. I chopped the switched power and ground leads out of the connector and directly soldered the radio power cord to those wires.
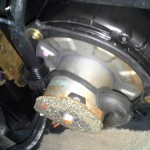
 As a side note, having the kick panel removed is also a great opportunity to fix the heater in the car. If your car heater only works on some speeds but not others, the culprit is very likely to be a faulty heater resistor, which is right next door to the power drop. In this car, speeds 0-2 (1-3 on the dial) went out first, leaving only speeds 3 and 4 (4 and 5 on the dial). More recently, the fourth speed went out, leaving us with only the blast furnace-like top setting, over which no conversation or radio could ever hope to be heard. With a fresh AC Delco 15-80571 heater resistor in hand, getting the heater system back to normal is relatively easy. Two birds, one stone, and no more putting off either task.
With the heater resistor replaced and the power cable now attached to the factory power drop, we can stuff the excess cable into the kick panel and put the carpet back in place over top if it, making sure, of course, to leave enough hanging out to reach the radio. Again, since Impalas are marketed as police cruisers, there are a number of consoles and other mounting devices from folks like Gramber Johnson, Havis or Jotto that would work. We opted for a slimmer DIY contraption similar to what a hump mount would yield to mount the Kenwood TM-281.
Since we hope to change vehicles before too long (and because the radio isn’t always in the car), we also opted out of poking fresh holes in the roof for an NMO mount, instead going with a Tram 1185 mag-mount antenna. In this configuration, we can get out pretty well, talking to distant repeaters and with other motorists via simplex with no hot wires, no reports of alternator hum, and no other noticeable issues. If you remember the traffic on I71 coming back from the 2014 Dayton Hamvention, we talked simplex to a Swedish operator most of the way back, including while we caught up with and then zoomed past him on US42 while he was stuck on I71. I liked the 1185 enough to get my parents one for Christmas this year, in fact.
Since I chose the switched power drop connection, I can leave the radio on all the time so it comes alive when I start the car and goes off when I shut the car off. It transmits at the full 65W when the car is running, but the radio will restart if you try to transmit with the car off. The low power 25W mode works fine without the car running, but you may drain your battery quickly.
Build a Portable Universal Radio Programmer
What is it?
Many amateur radio transceivers allow users to set up memory channels to store their favorite simplex frequencies or repeater information including frequency (such as repeater name, frequncy, offset, tones and more).
Programming memory channels using the radio’s keypad can often be incredibly cumbersome and time consuming.
Using factory or homebrew programming cables can speed up the process but often introduces other issues (on top of the cost of having to purchase a programming cable for each radio). Topping the list of those issues are usually driver problems that prevent the computer from being able to use the cable. This method also means either having to take your radios to a computer or bringing the computer to your radios.
The project outlined in the document below will describe how to make a portable “universal” ham radio transceiver programmer. The total cost of the project is around $40-50 (much less if you use parts you already have) and will yield a programmer that is approximately the size of a deck of cards, weighs only a few ounces and includes the computer and the cables you need to program your radio. This programmer (perfect for travelers, emergencies and more) will connect to any display with HDMI or RCA video inputs and is powered by a standard USB power outlet, computer port or cell phone charger.
Build one today and keep it with your ham radio gear so you can program your radios on the go!
What You’ll Need
To build the programmer, you’ll need:
- A set up Raspberry Pi computer (buy Raspberry Pi here)
- Connectors for your specific radio
- Soldering iron, solder and other items commensurate with building cables
- About an hour of free time
To set up and use the programmer, you’ll need:
- Standard computer interface devices (USB keyboard/mouse, HDMI/RCA display)
- Micro USB power supply (cell phone charger, USB cable, etc.)
- Radio
Build the Programmer

Convert a Computer Power Supply for Bench Use
What is it?
This one is pretty simple and the idea has been around for a while (see the “St. Louis Switcher”). The idea is to take an ATX form factor power supply (available for free from dead computers everywhere), hack off some wires, add about $5 worth of parts from the electronics store (like MCM Electronics) or the junk bin and end up with a bench power supply that has enough power to run many mobile transceivers as base stations.

What You’ll Need
To build the power supply, you’ll need:
- An ATX power supply with enough power for your job
- An SPST (on/off) switch
- A power resistor
- Your favorite power connectors (Power Pole, binding posts, etc.)
- Soldering iron, solder, wire cutters & strippers, heat shrink
- Half an hour of free time
Build the Power Supply
At a recent hamfest, Chris KK4RZH gave us some info on a handy gadget to make an ATX PSU conversion even easier: A breakout board that plugs directly to the motherboard header pigtail to eliminate the need to all of the cutting, soldering, etc. It should be noted that these breakout boards likely will not supply the current needed to operate a mobile ham radio transceiver. However, they should work fine to charge batteries, operate QRP or other applications which use lower current. Check out the breakout board here.
